Screen Capture
Screenshot
Use when the user explicitly asks for a desktop or system screenshot (full screen, specific app or window, or a pixel region), or when tool-specific capture capabilities are unavailable and an OS-level capture is needed.
---
name: "screenshot"
description: "Use when the user explicitly asks for a desktop or system screenshot (full screen, specific app or window, or a pixel region), or when tool-specific capture capabilities are unavailable and an OS-level capture is needed."
author: openai
---


# Screenshot Capture

Follow these save-location rules every time:

1) If the user specifies a path, save there.
2) If the user asks for a screenshot without a path, save to the OS default screenshot location.
3) If Codex needs a screenshot for its own inspection, save to the temp directory.

## Tool priority

- Prefer tool-specific screenshot capabilities when available (for example: a Figma MCP/skill for Figma files, or Playwright/agent-browser tools for browsers and Electron apps).
Overview
On macOS, run the preflight helper once before window/app capture. It checks Screen Recording permission, explains why it is needed, and requests it in one place.
Manual install (npx, ZIP)
npx skills add davila7/claude-code-templates --skill screenshot -g -a claude-codenpx degit davila7/claude-code-templates/cli-tool/components/skills/media/screenshot#main ~/.claude/skills/screenshotConnects with Agent Alley MCP · agentalley.io/mcp
Files included
SKILL.md7.6 KB
Read SKILL.md here
Show the full text269 lines
Screenshot Capture
Follow these save-location rules every time:
- If the user specifies a path, save there.
- If the user asks for a screenshot without a path, save to the OS default screenshot location.
- If Codex needs a screenshot for its own inspection, save to the temp directory.
Tool priority
- Prefer tool-specific screenshot capabilities when available (for example: a Figma MCP/skill for Figma files, or Playwright/agent-browser tools for browsers and Electron apps).
- Use this skill when explicitly asked, for whole-system desktop captures, or when a tool-specific capture cannot get what you need.
- Otherwise, treat this skill as the default for desktop apps without a better-integrated capture tool.
macOS permission preflight (reduce repeated prompts)
On macOS, run the preflight helper once before window/app capture. It checks Screen Recording permission, explains why it is needed, and requests it in one place.
The helpers route Swift's module cache to $TMPDIR/codex-swift-module-cache
to avoid extra sandbox module-cache prompts.
bash <path-to-skill>/scripts/ensure_macos_permissions.sh
To avoid multiple sandbox approval prompts, combine preflight + capture in one command when possible:
bash <path-to-skill>/scripts/ensure_macos_permissions.sh && \
python3 <path-to-skill>/scripts/take_screenshot.py --app "Codex"
For Codex inspection runs, keep the output in temp:
bash <path-to-skill>/scripts/ensure_macos_permissions.sh && \
python3 <path-to-skill>/scripts/take_screenshot.py --app "<App>" --mode temp
Use the bundled scripts to avoid re-deriving OS-specific commands.
macOS and Linux (Python helper)
Run the helper from the repo root:
python3 <path-to-skill>/scripts/take_screenshot.py
Common patterns:
- Default location (user asked for "a screenshot"):
python3 <path-to-skill>/scripts/take_screenshot.py
- Temp location (Codex visual check):
python3 <path-to-skill>/scripts/take_screenshot.py --mode temp
- Explicit location (user provided a path or filename):
python3 <path-to-skill>/scripts/take_screenshot.py --path output/screen.png
- App/window capture by app name (macOS only; substring match is OK; captures all matching windows):
python3 <path-to-skill>/scripts/take_screenshot.py --app "Codex"
- Specific window title within an app (macOS only):
python3 <path-to-skill>/scripts/take_screenshot.py --app "Codex" --window-name "Settings"
- List matching window ids before capturing (macOS only):
python3 <path-to-skill>/scripts/take_screenshot.py --list-windows --app "Codex"
- Pixel region (x,y,w,h):
python3 <path-to-skill>/scripts/take_screenshot.py --mode temp --region 100,200,800,600
- Focused/active window (captures only the frontmost window; use
--appto capture all windows):
python3 <path-to-skill>/scripts/take_screenshot.py --mode temp --active-window
- Specific window id (use --list-windows on macOS to discover ids):
python3 <path-to-skill>/scripts/take_screenshot.py --window-id 12345
The script prints one path per capture. When multiple windows or displays match, it prints multiple paths (one per line) and adds suffixes like -w<windowId> or -d<display>. View each path sequentially with the image viewer tool, and only manipulate images if needed or requested.
Workflow examples
- "Take a look at <App> and tell me what you see": capture to temp, then view each printed path in order.
bash <path-to-skill>/scripts/ensure_macos_permissions.sh && \
python3 <path-to-skill>/scripts/take_screenshot.py --app "<App>" --mode temp
- "The design from Figma is not matching what is implemented": use a Figma MCP/skill to capture the design first, then capture the running app with this skill (typically to temp) and compare the raw screenshots before any manipulation.
Multi-display behavior
- On macOS, full-screen captures save one file per display when multiple monitors are connected.
- On Linux and Windows, full-screen captures use the virtual desktop (all monitors in one image); use
--regionto isolate a single display when needed.
Linux prerequisites and selection logic
The helper automatically selects the first available tool:
scrotgnome-screenshot- ImageMagick
import
If none are available, ask the user to install one of them and retry.
Coordinate regions require scrot or ImageMagick import.
--app, --window-name, and --list-windows are macOS-only. On Linux, use
--active-window or provide --window-id when available.
Windows (PowerShell helper)
Run the PowerShell helper:
powershell -ExecutionPolicy Bypass -File <path-to-skill>/scripts/take_screenshot.ps1
Common patterns:
- Default location:
powershell -ExecutionPolicy Bypass -File <path-to-skill>/scripts/take_screenshot.ps1
- Temp location (Codex visual check):
powershell -ExecutionPolicy Bypass -File <path-to-skill>/scripts/take_screenshot.ps1 -Mode temp
- Explicit path:
powershell -ExecutionPolicy Bypass -File <path-to-skill>/scripts/take_screenshot.ps1 -Path "C:\Temp\screen.png"
- Pixel region (x,y,w,h):
powershell -ExecutionPolicy Bypass -File <path-to-skill>/scripts/take_screenshot.ps1 -Mode temp -Region 100,200,800,600
- Active window (ask the user to focus it first):
powershell -ExecutionPolicy Bypass -File <path-to-skill>/scripts/take_screenshot.ps1 -Mode temp -ActiveWindow
- Specific window handle (only when provided):
powershell -ExecutionPolicy Bypass -File <path-to-skill>/scripts/take_screenshot.ps1 -WindowHandle 123456
Direct OS commands (fallbacks)
Use these when you cannot run the helpers.
macOS
- Full screen to a specific path:
screencapture -x output/screen.png
- Pixel region:
screencapture -x -R100,200,800,600 output/region.png
- Specific window id:
screencapture -x -l12345 output/window.png
- Interactive selection or window pick:
screencapture -x -i output/interactive.png
Linux
- Full screen:
scrot output/screen.png
gnome-screenshot -f output/screen.png
import -window root output/screen.png
- Pixel region:
scrot -a 100,200,800,600 output/region.png
import -window root -crop 800x600+100+200 output/region.png
- Active window:
scrot -u output/window.png
gnome-screenshot -w -f output/window.png
Error handling
- On macOS, run
bash <path-to-skill>/scripts/ensure_macos_permissions.shfirst to request Screen Recording in one place. - If you see "screen capture checks are blocked in the sandbox", "could not create image from display", or Swift
ModuleCachepermission errors in a sandboxed run, rerun the command with escalated permissions. - If macOS app/window capture returns no matches, run
--list-windows --app "AppName"and retry with--window-id, and make sure the app is visible on screen. - If Linux region/window capture fails, check tool availability with
command -v scrot,command -v gnome-screenshot, andcommand -v import. - If saving to the OS default location fails with permission errors in a sandbox, rerun the command with escalated permissions.
- Always report the saved file path in the response.
| 1 | |
| 2 | name "screenshot" |
| 3 | description "Use when the user explicitly asks for a desktop or system screenshot (full screen, specific app or window, or a pixel region), or when tool-specific capture capabilities are unavailable and an OS-level capture is needed." |
| 4 | author openai |
| 5 | |
| 6 | |
| 7 | |
| 8 | # Screenshot Capture |
| 9 | |
| 10 | Follow these save-location rules every time: |
| 11 | |
| 12 | 1) If the user specifies a path, save there. |
| 13 | 2) If the user asks for a screenshot without a path, save to the OS default screenshot location. |
| 14 | 3) If Codex needs a screenshot for its own inspection, save to the temp directory. |
| 15 | |
| 16 | ## Tool priority |
| 17 | |
| 18 | Prefer tool-specific screenshot capabilities when available (for example: a Figma MCP/skill for Figma files, or Playwright/agent-browser tools for browsers and Electron apps). |
| 19 | Use this skill when explicitly asked, for whole-system desktop captures, or when a tool-specific capture cannot get what you need. |
| 20 | Otherwise, treat this skill as the default for desktop apps without a better-integrated capture tool. |
| 21 | |
| 22 | ## macOS permission preflight (reduce repeated prompts) |
| 23 | |
| 24 | On macOS, run the preflight helper once before window/app capture. It checks |
| 25 | Screen Recording permission, explains why it is needed, and requests it in one |
| 26 | place. |
| 27 | |
| 28 | The helpers route Swift's module cache to `$TMPDIR/codex-swift-module-cache` |
| 29 | to avoid extra sandbox module-cache prompts. |
| 30 | |
| 31 | |
| 32 | bash <path-to-skill>/scripts/ensure_macos_permissions.sh |
| 33 | |
| 34 | |
| 35 | To avoid multiple sandbox approval prompts, combine preflight + capture in one |
| 36 | command when possible: |
| 37 | |
| 38 | |
| 39 | bash <path-to-skill>/scripts/ensure_macos_permissions.sh && \ |
| 40 | python3 <path-to-skill>/scripts/take_screenshot.py --app "Codex" |
| 41 | |
| 42 | |
| 43 | For Codex inspection runs, keep the output in temp: |
| 44 | |
| 45 | |
| 46 | bash <path-to-skill>/scripts/ensure_macos_permissions.sh && \ |
| 47 | python3 <path-to-skill>/scripts/take_screenshot.py --app "<App>" --mode temp |
| 48 | |
| 49 | |
| 50 | Use the bundled scripts to avoid re-deriving OS-specific commands. |
| 51 | |
| 52 | ## macOS and Linux (Python helper) |
| 53 | |
| 54 | Run the helper from the repo root: |
| 55 | |
| 56 | |
| 57 | python3 <path-to-skill>/scripts/take_screenshot.py |
| 58 | |
| 59 | |
| 60 | Common patterns: |
| 61 | |
| 62 | Default location (user asked for "a screenshot"): |
| 63 | |
| 64 | |
| 65 | python3 <path-to-skill>/scripts/take_screenshot.py |
| 66 | |
| 67 | |
| 68 | Temp location (Codex visual check): |
| 69 | |
| 70 | |
| 71 | python3 <path-to-skill>/scripts/take_screenshot.py --mode temp |
| 72 | |
| 73 | |
| 74 | Explicit location (user provided a path or filename): |
| 75 | |
| 76 | |
| 77 | python3 <path-to-skill>/scripts/take_screenshot.py --path output/screen.png |
| 78 | |
| 79 | |
| 80 | App/window capture by app name (macOS only; substring match is OK; captures all matching windows): |
| 81 | |
| 82 | |
| 83 | python3 <path-to-skill>/scripts/take_screenshot.py --app "Codex" |
| 84 | |
| 85 | |
| 86 | Specific window title within an app (macOS only): |
| 87 | |
| 88 | |
| 89 | python3 <path-to-skill>/scripts/take_screenshot.py --app "Codex" --window-name "Settings" |
| 90 | |
| 91 | |
| 92 | List matching window ids before capturing (macOS only): |
| 93 | |
| 94 | |
| 95 | python3 <path-to-skill>/scripts/take_screenshot.py --list-windows --app "Codex" |
| 96 | |
| 97 | |
| 98 | Pixel region (x,y,w,h): |
| 99 | |
| 100 | |
| 101 | python3 <path-to-skill>/scripts/take_screenshot.py --mode temp --region 100,200,800,600 |
| 102 | |
| 103 | |
| 104 | Focused/active window (captures only the frontmost window; use `--app` to capture all windows): |
| 105 | |
| 106 | |
| 107 | python3 <path-to-skill>/scripts/take_screenshot.py --mode temp --active-window |
| 108 | |
| 109 | |
| 110 | Specific window id (use --list-windows on macOS to discover ids): |
| 111 | |
| 112 | |
| 113 | python3 <path-to-skill>/scripts/take_screenshot.py --window-id 12345 |
| 114 | |
| 115 | |
| 116 | The script prints one path per capture. When multiple windows or displays match, it prints multiple paths (one per line) and adds suffixes like `-w<windowId>` or `-d<display>`. View each path sequentially with the image viewer tool, and only manipulate images if needed or requested. |
| 117 | |
| 118 | ### Workflow examples |
| 119 | |
| 120 | "Take a look at <App> and tell me what you see": capture to temp, then view each printed path in order. |
| 121 | |
| 122 | |
| 123 | bash <path-to-skill>/scripts/ensure_macos_permissions.sh && \ |
| 124 | python3 <path-to-skill>/scripts/take_screenshot.py --app "<App>" --mode temp |
| 125 | |
| 126 | |
| 127 | "The design from Figma is not matching what is implemented": use a Figma MCP/skill to capture the design first, then capture the running app with this skill (typically to temp) and compare the raw screenshots before any manipulation. |
| 128 | |
| 129 | ### Multi-display behavior |
| 130 | |
| 131 | On macOS, full-screen captures save one file per display when multiple monitors are connected. |
| 132 | On Linux and Windows, full-screen captures use the virtual desktop (all monitors in one image); use `--region` to isolate a single display when needed. |
| 133 | |
| 134 | ### Linux prerequisites and selection logic |
| 135 | |
| 136 | The helper automatically selects the first available tool: |
| 137 | |
| 138 | 1) `scrot` |
| 139 | 2) `gnome-screenshot` |
| 140 | 3) ImageMagick `import` |
| 141 | |
| 142 | If none are available, ask the user to install one of them and retry. |
| 143 | |
| 144 | Coordinate regions require `scrot` or ImageMagick `import`. |
| 145 | |
| 146 | `--app`, `--window-name`, and `--list-windows` are macOS-only. On Linux, use |
| 147 | `--active-window` or provide `--window-id` when available. |
| 148 | |
| 149 | ## Windows (PowerShell helper) |
| 150 | |
| 151 | Run the PowerShell helper: |
| 152 | |
| 153 | |
| 154 | powershell -ExecutionPolicy Bypass -File <path-to-skill>/scripts/take_screenshot.ps1 |
| 155 | |
| 156 | |
| 157 | Common patterns: |
| 158 | |
| 159 | Default location: |
| 160 | |
| 161 | |
| 162 | powershell -ExecutionPolicy Bypass -File <path-to-skill>/scripts/take_screenshot.ps1 |
| 163 | |
| 164 | |
| 165 | Temp location (Codex visual check): |
| 166 | |
| 167 | |
| 168 | powershell -ExecutionPolicy Bypass -File <path-to-skill>/scripts/take_screenshot.ps1 -Mode temp |
| 169 | |
| 170 | |
| 171 | Explicit path: |
| 172 | |
| 173 | |
| 174 | powershell -ExecutionPolicy Bypass -File <path-to-skill>/scripts/take_screenshot.ps1 -Path "C:\Temp\screen.png" |
| 175 | |
| 176 | |
| 177 | Pixel region (x,y,w,h): |
| 178 | |
| 179 | |
| 180 | powershell -ExecutionPolicy Bypass -File <path-to-skill>/scripts/take_screenshot.ps1 -Mode temp -Region 100,200,800,600 |
| 181 | |
| 182 | |
| 183 | Active window (ask the user to focus it first): |
| 184 | |
| 185 | |
| 186 | powershell -ExecutionPolicy Bypass -File <path-to-skill>/scripts/take_screenshot.ps1 -Mode temp -ActiveWindow |
| 187 | |
| 188 | |
| 189 | Specific window handle (only when provided): |
| 190 | |
| 191 | |
| 192 | powershell -ExecutionPolicy Bypass -File <path-to-skill>/scripts/take_screenshot.ps1 -WindowHandle 123456 |
| 193 | |
| 194 | |
| 195 | ## Direct OS commands (fallbacks) |
| 196 | |
| 197 | Use these when you cannot run the helpers. |
| 198 | |
| 199 | ### macOS |
| 200 | |
| 201 | Full screen to a specific path: |
| 202 | |
| 203 | |
| 204 | screencapture -x output/screen.png |
| 205 | |
| 206 | |
| 207 | Pixel region: |
| 208 | |
| 209 | |
| 210 | screencapture -x -R100,200,800,600 output/region.png |
| 211 | |
| 212 | |
| 213 | Specific window id: |
| 214 | |
| 215 | |
| 216 | screencapture -x -l12345 output/window.png |
| 217 | |
| 218 | |
| 219 | Interactive selection or window pick: |
| 220 | |
| 221 | |
| 222 | screencapture -x -i output/interactive.png |
| 223 | |
| 224 | |
| 225 | ### Linux |
| 226 | |
| 227 | Full screen: |
| 228 | |
| 229 | |
| 230 | scrot output/screen.png |
| 231 | |
| 232 | |
| 233 | |
| 234 | gnome-screenshot -f output/screen.png |
| 235 | |
| 236 | |
| 237 | |
| 238 | import -window root output/screen.png |
| 239 | |
| 240 | |
| 241 | Pixel region: |
| 242 | |
| 243 | |
| 244 | scrot -a 100,200,800,600 output/region.png |
| 245 | |
| 246 | |
| 247 | |
| 248 | import -window root -crop 800x600+100+200 output/region.png |
| 249 | |
| 250 | |
| 251 | Active window: |
| 252 | |
| 253 | |
| 254 | scrot -u output/window.png |
| 255 | |
| 256 | |
| 257 | |
| 258 | gnome-screenshot -w -f output/window.png |
| 259 | |
| 260 | |
| 261 | ## Error handling |
| 262 | |
| 263 | On macOS, run `bash <path-to-skill>/scripts/ensure_macos_permissions.sh` first to request Screen Recording in one place. |
| 264 | If you see "screen capture checks are blocked in the sandbox", "could not create image from display", or Swift `ModuleCache` permission errors in a sandboxed run, rerun the command with escalated permissions. |
| 265 | If macOS app/window capture returns no matches, run `--list-windows --app "AppName"` and retry with `--window-id`, and make sure the app is visible on screen. |
| 266 | If Linux region/window capture fails, check tool availability with `command -v scrot`, `command -v gnome-screenshot`, and `command -v import`. |
| 267 | If saving to the OS default location fails with permission errors in a sandbox, rerun the command with escalated permissions. |
| 268 | Always report the saved file path in the response. |
| 269 |
Details
- License
- MIT
- Stars on the repo
- ★ 32,299
- Checked
- Source
- davila7/claude-code-templates ↗
- Creator
- davila7 · 212 listings
Similar skills
See all →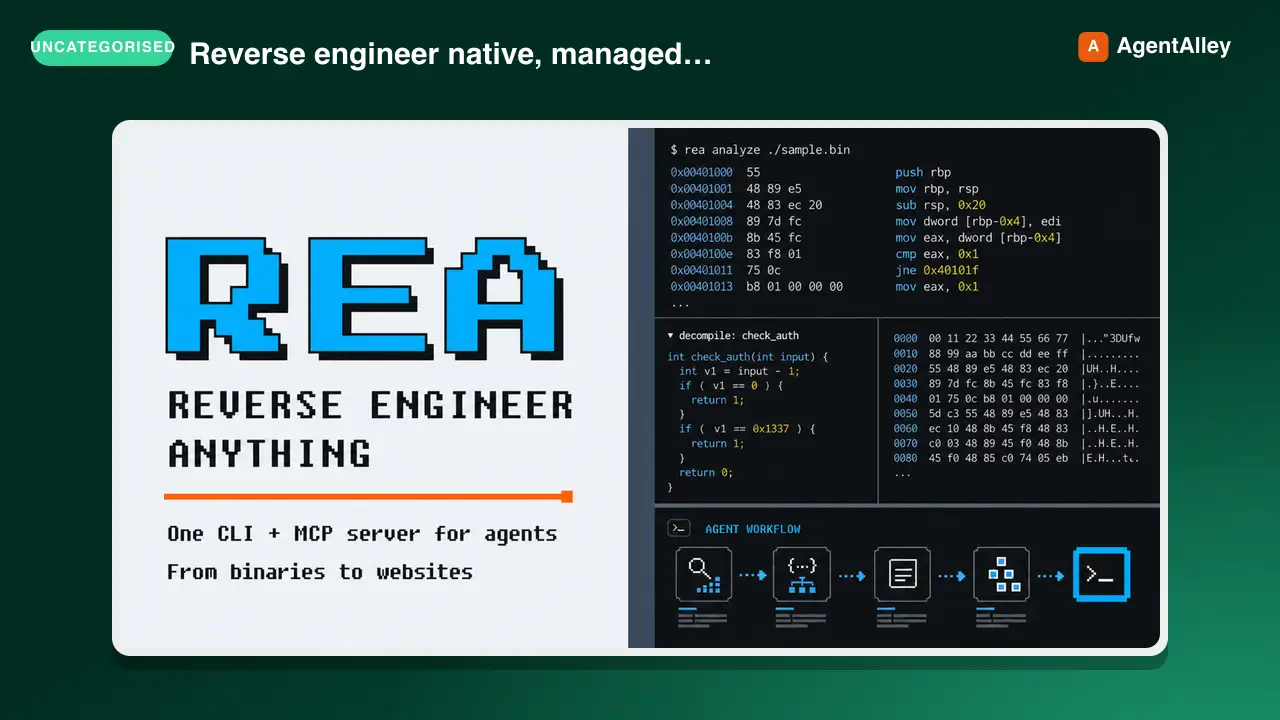 SkillCross-Platform Reverse Engineer
 morluto/rea · by morlutoReverse engineer native, managed, Electron/JavaScript, packaged, firmware, and browser targets with REA. Use shipped-artifact or requested runtime evidence to explain features, compare versions, decompile code, or guide a reconstruction. Skip REA for ordinary source-repository architecture analysis.★ 316k GitHub stars
 SkillBrainstorm Ideas
 obra/superpowers · by obraYou MUST use this before any creative work - creating features, building components, adding functionality, or modifying behavior. Explores user intent, requirements and design before implementation.★ 290k GitHub stars
 SkillCode Review Feedback Analyzerobra/superpowers · by obraUse when receiving code review feedback, before implementing suggestions, especially if feedback seems unclear or technically questionable - requires technical rigor and verification, not performative agreement or blind implementation★ 290k GitHub stars
 SkillBug Diagnosis Framework
 mattpocock/skills · by mattpocockDiagnosis loop for hard bugs and performance regressions. Use when the user says "diagnose"/"debug this", or reports something broken/throwing/failing/slow.★ 267k GitHub stars
 SkillImplement Specmattpocock/skills · by mattpocockImplement the result of /to-spec and /to-tickets in code.★ 267k GitHub stars
 SkillPR Description Writermattpocock/skills · by mattpocockUse when writing a PR body.★ 267k GitHub stars
More from davila7
 Skill2D Game Development
 davila7/claude-code-templates · by davila72D game development principles. Sprites, tilemaps, physics, camera.★ 32.3k GitHub stars
 Skill3D Game Development Principlesdavila7/claude-code-templates · by davila73D game development principles. Rendering, shaders, physics, cameras.★ 32.3k GitHub stars
 Skill3D Web Experience Builderdavila7/claude-code-templates · by davila7Expert in building 3D experiences for the web - Three.js, React Three Fiber, Spline, WebGL, and interactive 3D scenes. Covers product configurators, 3D portfolios, immersive websites, and bringing depth to web experiences. Use when: 3D website, three.js, WebGL, react three fiber, 3D experience.★ 32.3k GitHub stars
 SkillSplit Test Setupdavila7/claude-code-templates · by davila7When the user wants to plan, design, or implement an A/B test or experiment. Also use when the user mentions "A/B test," "split test," "experiment," "test this change," "variant copy," "multivariate test," or "hypothesis." For tracking implementation, see analytics-tracking.★ 32.3k GitHub stars
 AgentResearch Literature Synthesizerdavila7/claude-code-templates · by davila7Academic research synthesis specialist. Use PROACTIVELY for comprehensive research on academic topics, literature reviews, technical investigations, and well-cited analysis combining multiple sources. <example>Context: A podcast episode needs a segment grounded in peer-reviewed evidence with formal citations. user: "Research the current state of transformer efficiency techniques for the episode, with proper academic citations." assistant: "I'll use the academic-research-synthesizer agent to search arXiv and Semantic Scholar, extract full-text findings via WebFetch, and produce a cited literature synthesis with confidence levels." <commentary>Use academic-research-synthesizer (not comprehensive-researcher) when the episode segment needs peer-reviewed sourcing, formal citation format, and explicit confidence tagging rather than general-purpose multi-source coverage.</commentary></example> <example>Context: The episode-orchestrator has routed a "literature review" request for a technical deep-dive segment. user: "Summarize the research landscape on federated learning privacy guarantees." assistant: "I'll invoke academic-research-synthesizer to systematically search academic sources, note peer-review status per source, and synthesize consensus vs. open debates."</example>★ 32.3k GitHub stars
 AgentAcademic Research Specialistdavila7/claude-code-templates · by davila7Academic research specialist for scholarly sources, peer-reviewed papers, and academic literature. Use PROACTIVELY for research paper analysis, literature reviews, citation tracking, and academic methodology evaluation. <example>Context: The research-orchestrator has kicked off Phase 4 parallel research on 'efficacy of intermittent fasting' and needs peer-reviewed evidence. user: "Find the academic evidence on intermittent fasting outcomes." assistant: "I'll use the academic-researcher agent to search Semantic Scholar, PubMed, and OpenAlex for peer-reviewed studies and write structured findings to academic-research.md." <commentary>The request is specifically for scholarly/peer-reviewed evidence rather than general web coverage or code, so academic-researcher (not web-researcher or technical-researcher) is the right specialist.</commentary></example> <example>Context: The user wants a literature review comparing methodologies across studies on a topic. user: "Can you review the literature on transformer model interpretability and identify research gaps?" assistant: "Let me invoke the academic-researcher agent to pull foundational and recent papers, extract methodologies, and surface open research gaps." <commentary>Literature review, methodology extraction, and research-gap identification are core academic-researcher capabilities, distinct from technical-researcher's focus on code repositories and implementations.</commentary></example>★ 32.3k GitHub stars